Monday, February 15, 2016

Asparagus and Broccoli Risotto

Risotto isn't something I would otherwise make, but we had an open container of vegetable broth and its something that had been in the works in the back of my mind so I decided to give it a try. I know usually people think that risotto is something that requires a lot of work and time but it really doesn't! It's more sophisticated than just your average pot of pasta, and much more inviting in taste. I decided to use the vegetables I already had in the kitchen, but did have to go out and buy a specific type of rice. I used arborio rice because from what I had read online, that was the perfect type of grain for risotto. Its not entirely a one pot wonder, but mostly easy on the dishes as well.

Ingredients
15 stalks asparagus
1/2 head of broccoli
1/2 white onion (diced)
5 cups vegetable broth
4 tablespoons butter (room temp)
salt to taste
pepper to taste
parmesan reggiano cheese


In a medium sized pot, pour in your vegetable broth - keep it on a low simmer and that is all it needs to do until the end of the rest of the procedure. In a large pan, add in 4 tablespoons of butter and let it melt. Slowly and steadily let that happen, you want to keep an eye on it. Don't turn the heat more than medium-low otherwise your butter will brown. Once the butter seems to be melting away, add in your onions and let them soak in the madness. You want your onions to become clear before you add in your rice. CORRECT! The uncooked rice goes into this pot. (weird, right? just watch!) As your rice cooks amongst the butter and the onions wait for it to turn brown. While the rice is browning, start blanching your vegetables. (boiling water, pinch of salt and just let the vegetables turn bright green (8-10 minutes), then throw them in an bowl of cold water and some ice to stop the cooking process)

rice is browning with the onions
rice fluffing with broth


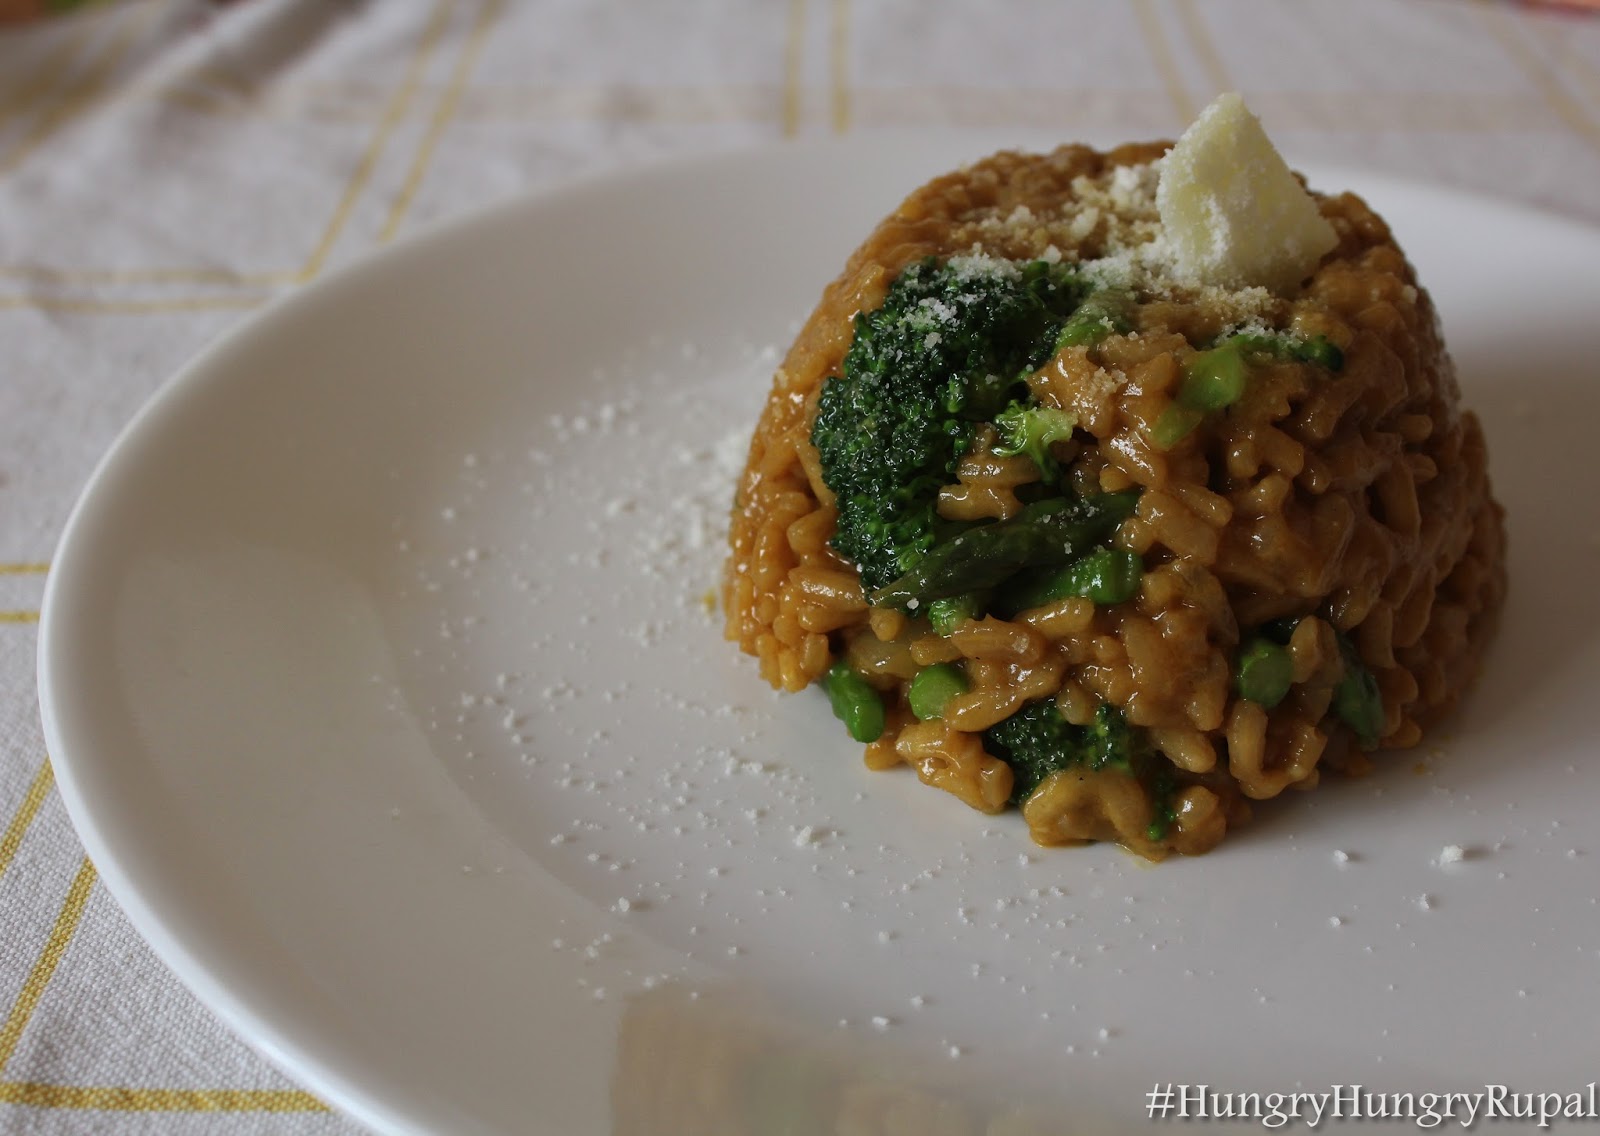
Once you've noticed the rice is brown, start laddling in your vegetable broth, about half a cup at a time. Each time you add in the broth, mix everything around. Don't add more broth until the previous amount has been completely absorbed. Make sure to keep mixing everything around, things can easily get stuck to the bottom and to the sides of the pan. Once all your broth has been added into the rice, give it a taste. You want the rice to be al-dente; meaning still have a bit of a bite but definitely no crunch. Once it has reached that point, you want to add in your vegetables and give it a coating of cheese.


Monday, January 25, 2016

Zucchini Pasta, Baked Tofu and a Spicy Peanut Sauce

It is one of my 2016 resolutions to start blogging more and giving more attention to sharing what I cook on a regular basis. So here we are, week three (four?) of this new year and this will be the start of a blogging storm. This recipe is something I am extremely proud of. I've been saying I want to give zucchini pasta a try, but I've been hesitant because zucchini as a vegetable isn't something I am a fan of (one of my closest friends from college (Sunita) calls it "za-ku-nee" and after that I couldn't take the vegetable seriously anymore)

My roommate was given a veggetti as a gift, and we finally took the time tonight to put it to the test. Let me tell you, this thing is magic. It was not only extremely easy to use, but was also easy to cleanup as well - definitely something important when you have a barely working dishwasher. I would not recommend using just a regular peeler and knife to make the zucchini spirals because it'll be difficult to maintain thickness and the consistency of length of each spiral. You'll be at risk of easily cutting a finger, or at least scraping a nail with the peeler. But, if you're game for the challenge then all the power to you!

I put together this recipe fairly quickly and I think it is great for a weekday. Personally, the best part about it is that there are not that many moving parts; meaning, you aren't multitasking with three different pans going on three different burners with 6 different bowls filling up your counter. So here I am sharing with you my recipe for zucchini pasta with baked tofu, in a spicy peanut sauce.

Ingredients
1 package cubed super firm tofu
2 zucchini
1/2 red onion - chopped
2 cloves garlic - minced
3 tablespoons soy sauce
2 1/2 tablespoons peanut butter (grab this from the fridge and keep it out, it'll help loosen it up!)
2 tablespoons sriracha
2 1/2 table spoons honey

Since I am vegetarian, tofu is something I've come to love. Whether I am baking it, or frying it, or marinating it - I know its something thats versatile and doesn't need to be worried about too much. For this dish, I planned on baking it. I had a package of super firm, that was already cubed. I drained the water BUT did nothing else to remove any water the tofu has already absorbed. I preheated my oven to 350, I used on a cookie sheet with some aluminum foil on top sprayed generously with cooking spray I layed down the cubes in no specific arrangement but just making sure each cube was separated. Again generously spraying the tops of each cube with cooking spray. Expect these to be in the oven for about 12-15 minutes before you flip them, and then they'll be in there for another 12-15. I personally love baking my tofu because I don't need to sit there and wait hours for al the water to drain out because the high heat in the oven makes them sweat it out and the water being released also helps them get that perfect golden  brown color.  Make sure to set your timer, if you let them sit in the oven for too long - they will get dry, crunchy and very chewy.

Into a bowl, start spiraling through your zucchini. Be very careful! The internal blades of the tool are extremely sharp, and you could easily cut yourself without realizing. I used two whole zucchinis, I portioned it out assuming my rooommate and I could each eat an entire one. After I finished one zucchini, I just took a knife and chopped twice through the spirals just to try to get them to a more manageable length. I spiraled the second zucchini and did the chop with it again.


This is a great time to check your tofu since you're more than halfway done!

In a small mixing bowl, add all of the ingredients for your sauce. Its going to require a little bit of mixing because of how thick the peanut butter is, and how you want to have all of the sauces become the same consistency. Just let that hang out while you get the rest of your dish together!

In a pan, with about two teaspoons of oil on medium to high heat, add in your onions. Once they are sizzling up a little bit, add in your garlic. Let them enjoy the heat and then throw in your baked tofu. Give them a toss and then pour in your sauce. Turn the heat off and give everything a toss and then add in your zucchini spirals. You don't need your zucchini to be in there for very long, maybe a minute at MAX because you just want to heat it through. If the zucchini stays in the heat too long it'll start releasing water, and that's not what you want!

Give everything a mix so that the sauce is well incorporated all over the tofu and the zucchini and make sure to add the leftover sauce thats in the pan into the bowl that you're using to serve this!


Thursday, November 5, 2015

Spicy Vegetable Noodle Soup

So, I hate soup. I absolutely despise it. It could be absolutely frigid outside, or I could have a horrible cold and I would rather stay hungry than eat (drink?) a bowl of soup. I just don't see how its filling, or a meal. It's a liquid! Liquids don't fill. Solid's fill. So I took a shot and tried to make something that would make me at least not hate soup as much as I do. Although this bowl of spicy broth and soft noodles was delicious - I still hate soup. But hey! I tried.
found at any supermarket!

1 small crown broccoli
3-4 spring onions (scallions)
1 cup peas
2 cloves garlic
10 baby carrots / 2 regular sized carrots
Chinese noodles (or thin pasta if you can't find Chinese noodles)
24 oz vegetable broth (a little more than half the box)
8 cups noodle cooking liquid
5 tablespoons sriracha sauce
3 tablespoons soy sauce
1 teaspoon grated ginger
3 tablespoons plum sauce

Since you can leave this to cook low and slow, I recommend cutting all your vegetables first instead of doing it while things are cooking. I cut my broccoli pretty small, trying to match sizes with the rest of the vegetables. My carrots were probably a 1/2 inch thick and same with my scallions.

In a large pot, I started boiling my water for the noodles. You can find it at any supermarket, you don't need to go to to any specific store for it. Just treat it as if its pasta - a little salt, a little oil and let it boil. I would advise only cooking the noodles a little more than halfway (4 minutes) so that the rest of the cooking can happen within the broth and vegetables.

In another large pot, add in your vegetable broth. Crack your garlic gloves, meaning lay them flat on your cutting board and with the flat part of your knife just press down so that they crack and are basically smushed. Throw those in, whole. This is a great time for your grated ginger too. Add in your carrots (they take the longest to soften) and then the broccoli about 2 minutes later. Keep an eye on your noodles and keep checking for how cooked they are - remember you DO NOT want to cook them completely yet.

Into your vegetable broth goes your sauces. Give everything a good stir, so your vegetables are mixing around with the broth and the sauces are mixing up among everything as well. Your noodles are probably ready to go now, so give them a check. And by ready to go I mean halfway cooked! Add the noodles into your broth liquid pot, and ladle in about half the pot of noodle cooking liquid. This will help not only flavor the soup, but also thicken it up from the starches of the noodles.

Just let the pot that you've added everything too - simmer. Keep it on a low to medium heat, no need to wait too long - probably 10 minutes at max because then you'll start overcooking your noodles into mush.

Enjoy!

Tuesday, October 27, 2015

Super Stuffed Peppers

Growing up is hard. It sometimes feels like the growing pains are just never going to end. My best friend says that its absolutely shocking how much I relate my feelings or try to convey what I am going through to food without even thinking about it. Food/cooking/eating is something I use as an outlet and feeding people is something that makes me immensely happy...can you see where this blog came from?
I know I haven't been the best blogger but.. I hope those that do read my blog get to learn a few tips here and there, and get as excited about food (and eating) as I do.

Never give up a second chance, especially if its for a second bite.

Super Stuffed Peppers:
2 peppers (any color)
1 tablespoon olive oil
2 cups (frozen) corn kernels
1/2 can of black beans
1/3 white onion (diced)
1 clove garlic (minced)
1 cup rice (or 1/2 rice packet)
1/4 cup grated or shredded pepper jack cheese (you can use more don't worry!)
1/2 tablespoon cayenne pepper
2 tablespoons taco seasoning
4 tablespoons taco sauce (extra won't hurt)
salt to taste (I rarely add salt to my food)
1 baking sheet

I think the best part about this dish is that its a simple, filling and mostly a one pot wonder.
Preheat your oven to 350 F. I would recommend to first prep all of your ingredients so you don't have too many things to do at once.

Dice up your onions and mince your garlic; open up your can of beans and give it a good rinse before setting them aside until their turn comes.I used frozen corn kernels,
so at this time I just took them out of the freezer and give them some time to defrost.
In a medium frying pan, throw in your olive oil and once its heating up, the onions. Once the onions have started to lose their color, then the garlic. This is a little trick I have learned because the first thing to usually overcook/burn is the garlic,and lets be real - who likes burnt garlic? So this way, the onions have cooked a little bit (probably halfway) and then the garlic get its turn to
join the party. You're aiming to keep your heat on the pan on the lower end of medium.

While those are sweating it out in your pan, prep your pepper. Cut the top part off by laying your pepper on a side, just trim off the lid of the pepper - giving you enough room to reach in and pull out the core and seeds. Tap the pepper against the side of your sink and justlet the seeds that are having trouble saying goodbye to the pepper fall out as well. Set them aside until you're ready to fill them up!

Back to your onions. They should be translucent by now and your garlic just reaching golden. Throw in that half can of beans you that you rinsed and kept aside. They are patiently waiting their time to shine, and it is now. After the beans, throw in the corn. They should be defrosted by now, and if they aren't the heat of the pan should make them move a little quicker.

I used a quinoa and rice packet because that is what I had handy. I popped it into the microwave for 90 seconds (as per the instructions)
and then just added about half the packet to the mixture of what was partying in our frying pan.
If you are making your own rice then boil your water (2:1 ratio always), and once the water is boiling add in your rice. In about 6 minutes, you'll see it start to fluff up... keep an eye on it!
Rice can easily stick to the bottom of a pot if forgotten (quite needy aren't they?)

Give everything a chance to meet each other! Give all your ingredients a good toss, and throw in your seasoning including your sauce. I made a note about extra sauce because its what helps the pepper soften from inside out; that juice that the pepper lets out, mixed with the flavors you created.
You're making magic.

Your oven is preheated. Your stuffing is ready. Your peppers are almost ready. Are you ready? Lay down a piece of foil on your baking sheet, grab one of the peppers that you cored earlier and start stuffing. Be generous! You'll be surprised how much you fit in there.
Top it off with that delicious pepper jack cheese and throw those bad boys on top of the foil and into the oven.
as stuffed as can be!
Keep an eye out! You don't want to burn your cheese. In about 10 minutes, give it a quick look. It should take between 15-25 minutes to get the cheese
melted and browned and the peppers softened.

and now... enjoy that stuffed pepper party.  

Tuesday, August 11, 2015

Tex-Mex Quinoa Bowl

My first post-grad blog post. I know everyone say's graduating college is hard, but you really aren't prepared for it until it happens to you. You step into all of these responsibilities without any kind of preparation, and I guess that is the best preparation of it all. I know this recipe is going to be a hit with all different types of people. Those of you who haven't graduated, its a one-pot wonder so less dishes! Those of you who have recently graduated, its a one-pot wonder so its quick and simple. And everyone else, (I am glad I got you thinking about your college days), this dish incorporates all your favorite ingredients that you might hesitate to use on a weeknight.

I am sharing a recipe that I have made at home for my family, and at my new home for myself and my roommate. With some adjustment for the people I was serving for, I think this dish is a hit. I apologize in advance for the lack of pictures because I really didn't think I was going to want to post this recipe in the first place!

2 tablespoons olive oil
1 clove garlic (minced)
1/2 onion (diced)
1 green pepper (diced)
2 tomato (diced)
1 can beans; washed & drained (I used kidney, feel free to use black or kidney!)
1 avocado
2 cups quinoa (2 cups liquid for 1 cup quinoa)
4 cups water (OR, if you have vegetable broth do 2 broth +2 water)
3 or 4 tablespoons taco seasoning
1 tablespoon garlic powder
2 cups pepperjack cheese (optional)
1 teaspoon BBQ sauce (optional)
3 or 4 dashes Tabasco sauce
salt to taste
pepper to taste

After you have diced all your vegetables, this is where the one-pot wonder action happens. You want to use a big pot, something you would boil pasta in. Add your oil and your tomato. Then your onions, and peppers and garlic comes last because you want it to cook with the help of all the other vegetables - not the other way around. Once your vegetables are sizzling a bit, add in your quinoa and liquid and seasonings. Give it a good stir so that your vegetables are floating around with your quinoa and all coming together to cook. Keep a fork handy because once the quinoa starts to cook, a fork helps fluff it up. Put a lid on your pot and wait about 6 minutes. The lid is important because the steam will help everything cook together!

Once this time passes, add in your beans. I assure you that everything will cook in time, but if you put your beans in any earlier they will be overcooked and mushy rather than cooked properly. After about another 6 minutes or so, everything should be cooked through. check your quinoa by using your fork to fluff it around, your goal is to minimum to no liquid remaining. Once its all cooked, throw in your cheese if you're using any and give it a quick toss to help the cheese start melting with the heat. Slice up your avocado however you like it, I personally cubed it up.

Spoon into a bowl and serve hot. I also used some chips to get some dipping action happening, which was delicious.


Enjoy! 

Thursday, April 23, 2015

Chickpea Salad Sandwich

The hiatus is over. I can't believe that I haven't had the time to blog in so incredibly long. Let me just tell you that senior year is not as easy as it seems! From classes to being sentimental and soaking in every minute of being at school... it is not that easy. But I have been thinking about blogging and just haven't had the free time to sit down and make it happen.. but here I am! I hope that after graduation I can make blogging a weekly thing, one of the more stable things going on by then.

But here we are for right now, my recipe today is the chickpea salad sandwich. Being vegetarian, I am constantly searching for things that will be substitutes to things that I have listened to my non-vegetarian friends constantly eating. This is a great substitute to a tuna salad sandwich, egg salad sandwich - any of those sorts.

Ingredients
1 can chickpeas
1 small pepper (color doesn't matter)
1/2 onion
1 small tomato
1/2 cup mayo
1/2 cup hummus
salt (to taste)
pepper (to taste)
sriracha (to taste)

In a bowl, add your chickpeas - washed and drained from the can. Chop up your vegetables and add them into the bowl as well. Drop in your wet ingredients aka the mayo and the hummus. With a masher or the back of the fork mash it all together and make sure all your ingredients together. Add in your seasonings and make sure you taste as you go along. I decided to put mine on some toasted bread, on top of a bed of baby spinach. Its definitely something you can eat plain, or as a side to the rest of your meal. I promise this is something quick, and very filling! Let me know what you think!


Tuesday, January 6, 2015

Strawberry "Cheesecake"

Shoutout to 2015: hope you all had a fantastic 2014, and an even better kickstart to this new year! Thanks for taking some time to read my blog - I really appreciate it!

Happy Holidays! One of everyones favorite things to do around the holiday time, or any time spent with family is to bake! I am obviously no exception to that, and to end my holiday break at home on a sweet note - I decided to make this delicious dessert. In all honesty, it was because of my mom pestering me to finish the groceries that I had bought throughout my vacation because neither my parents nor my brother eat the junk I do (#collegekidprobs). So after having done some reading online and some research about why cheesecakes were almost always made with eggs and therefore, never made in my house. This recipe is my best representation of how to make a cheesecake without using eggs or even milk!

In my recipe, I used strawberries because thats what fruit we had on hand and I felt that the strawberries were going to be tart enough to cut the sweetness of the condensed milk I was planning on using. If your family isn't as strawberry fanatic as mine is, feel free to use a different fruit! But definitely keep in mind the overall sweetness factor of the condensed milk in your decision making!

Ingredients
1 graham cracker crust (or 6 mini crusts)
5-7 strawberries (in fourths, making it easy to puree)
4 oz cream cheese *ROOM TEMP*
4 oz mascarpone cheese *ROOM TEMP*
1 14oz can condensed milk
1/3 cup lemon juice
2 tablespoons sugar
1 teaspoon corn starch

Cut up your strawberries and have them pretty small, it'll be easier to puree. Once you have pureed them, put them in a saucepan on low/medium heat. Add in your sugar (if you think you need it!!! don't feel compelled!) and your corn starch - bring your mixture to boil. It will take about 5-7 minutes for the components to come together and boil, continue stirring throughout this time so the corn starch dissolves within the puree and doesn't get clumpy and lumpy. Once this is done, set it aside to cool - you won't need it for a little while!

In a bowl, whisk together your cream cheese and mascarpone. If you can't find mascarpone cheese don't worry about it - use a full 8 oz container of cream cheese and it'll work just as fine. Whip it up, beat it down, and add in your can of condensed milk. Its best to do this slowly just so half the mix doesn't end up on you or your workstation. Add in your lemon juice and mix it all up. This mixture will be a similar consistency as a cake batter but a little thicker because of the condensed milk. Set aside to rest for about 5 minutes while you prep your crust.

I used mini crusts just because I know my family likes individual servings better but feel free to use one giant crust as well, whatever you prefer or have on hand! You should be able to pour in your cream cheese mixture rather than having to spoon it because that will unfortunately take quite some time. Once you've filled you crust to about inch or so from where the crust starts - you are good to go. Grab that fruit sauce you made earlier, and dollop on some of it throughout the cream cheese mixture. Using a knife or a fork, start painting. Honestly, the only thing to NOT do here is dig your knife or fork into the bottom of your crust - DO NOT DO THAT. That is not good! It'll ruin your base and might even have your liquid start leaking around.

Put this badboy(s) into your fridge and let it sit for at least two to three hours. The longer it sits, the better it will be! Hope you enjoy!


Monday, December 1, 2014

Sproutin' Around

Thanksgiving is one of the most eagerly awaited holidays of the entire year. Although when you are vegetarian, it becomes a little harder to be as excited about this holiday when one of the largest aspects of it (Turkey) gets taken off the table. But of course, thanksgiving isn't about just the food - its about giving thanks, being with family friends and loved ones in general. Its about taking the time to be grateful, to be optimistic, and to be genuine. And as a college student, its about taking home your weight in laundry, and realizing that you are absolutely dumbfounded for where your entire fall semester has gone... and that you have a very small amount of time to get your grades up.

I am extremely lucky to grow up with a family that lets me cook (even when it isn't that good), and gives me constant feedback on how everything went. This thanksgiving was nothing short of that. One of my favorite vegetables is brussels sprouts, and I know many of you just questioned my sanity  but HEAR ME OUT! I promise you these little things are extremely versatile and you can honestly make them with so many different additions, that you will forget what they looked like when you started.

Ingredients
2 cups of brussels sprouts
3 table spoons olive oil
salt/peppers
figs (i used dried because fresh are not in season!)

Preheat your oven to 325F and start washing and cutting your sprouts. After cutting off the bottom, I choose to cut each one into four in hopes of upping my quantities. On a baking sheet, distribute your oil evenly and make sure you don't have any excess!! Extra oil when trying to roast vegetables is the absolute worst thing in the entire world!! Throw on your brussels sprouts and try to make sure they are layed out evenly. Set your timer for 10 minutes, and get a pot of boiling water going so you can rehydrate your dried figs. Once your water is boiled, throw in your dried figs so that way you can get them to not have as much of a chewy texture and can make more usage out of them. After, add them to your baking sheet with your sprouts hanging out in the oven - that way the figs can roast and become even more tender - let out some juice to add even more flavor to the brussels sprouts and just in general be amazing. After about 10 more minutes of roasting, everything should be ready to go. Add salt, pepper and chilli flakes and I promise you won't regret it.


Monday, November 10, 2014

Faux Cheesesteak

I guess its safe to say that senioritis doesn't apply to just my academics, but also applies to blogging. But here we are folks, back at it one more time!

Originally being from the NJ/NY area my entire life, things that remind me of home include bagels and crispy pizza. After having lived in Pennsylvania for four years, its safe to say that your eyes open up to what other cities are extremely well known for. Knowing several people (half of Penn State) who are from the Philadelphia area, and who would commit felonies for their cheesesteaks from home - I decided to give them a try. Obviously being a vegetarian that wasn't really an option, so here is my take on a cheesesteak.

Since everyone's specific taste profile to their cheesesteak, or any sandwich for that matter is pretty diverse - you really have a lot of wiggle room for the tastes that you want your sandwich to have. I guess this is a great time to show off my favorite faux meat brand.
Personally, I use this brand for almost any faux meat I cook!

Ingredients
a handful of vegetarian chicken
1 bell pepper
1/2 onion
1-2 hoagie (keeping with the phillyness) roll
American cheese or Mozzarella cheese
mayo/siracha
salt/pepper


In a small pan, start cooking your vegetarian chicken. Assume that you are going to cook it 95% completely before chopping it up and throwing it in with your sauteeing vegetables. Dice up your onions and peppers and in a separate pan (sorry more dishes!),  throw them in and let them feel the heat. Keep your stove on low to medium, and make sure you are checking on your veggie chicken! Don't forget about it! In your vegetable pan, add in your salt and pepper and make sure you keep mixing things around - you want everything to get an equal amount of heat. Once your veggie chicken has cooked, on a cutting board - shred it, dice it, whatever you want - but try to get it to be the same size as what your vegetables are. Throw it into the same pan where you have been sweating down your vegetables. Throw in the siracha sauce and let everyone get to know one another. As this is happening, make sure you are toasting your bread!

I unfortunately only had shredded cheese on hand, so I decided to throw it into the same pan that the rest of my dinner was cooking in. Letting it melt, I made sure to keep mixing the chicken and vegetables around so nothing was sticking to the pan. Once the bread was toasted, I added a little bit of mayo to the bottom of the roll and layered on my cheesesteak and added a little extra cheese on top.


Sunday, August 10, 2014

Dummy Donuts

Can I be more obvious as to what this post is going to be about from the title? I hope you guys aren't struggling to figure it out... so donuts are something where you just can't go wrong. You can get them sweet, spicy, savory - any type of way your taste is feeling. I spent some time researching a variety of different recipes that I thought would be perfect to make my own homemade donuts. Trust me, there are a lot of ways to make donuts - but this is MY way. Obviously, because its me - this recipe is eggless (WAHOO!). My goal for this recipe is to show you guys that even the hardest things can be done at home, without spending hours slaving away in the kitchen. Although donuts are a little more technically oriented, even if you mess up - you could basically just create your own type of donut and surprise all of your tasters.

Ingredients:
2 cups all purpose flour
2 tablesoons (1 packet) dry active yeast
1 teaspoon salt
2/3 tablespoons sugar
1/4 cup butter
3/4 cup milk
1 teaspoon vanilla extract

Glaze:
confectioner sugar
milk
**any extra items you would like to flavor** 

Mix together all of your wet ingredients, slowly incorporating the flour about 1/2 cup at a time. Make sure you using your spoon to get everything off the sides of your bowl - no ingredients left behind! Once all of your ingredients are in the bowl, you have to start getting your hands involved. Remember, this is a dough - not a batter! Treat it that way! Push, pull, kneed - everything you can do to make sure this dough is soft and elastic. Once its reached the right consistency, keep it on the bowl, grease it up a little and cover it. Put it somewhere that is a little warmer than room temperature, perhaps the oven or the microwave.

Once your dough has rested and risen, you'll know - I promise. Poke the dough and if you're poke mark is still there - you are good to go! FLOUR your countertop, or whatever you are rolling your dough out on. FLOUR FLOUR FLOUR. The cutting board or the countertop doesn't want to eat your dough, but without flouring it - it will. Roll it out to about 2 inches thick, about the length of your fingernail is how thick the dough should be. Use whatever kind of a cutter you have, if you have any kind of pasta bottle top or an actual donut cutter - just start cutting. Make sure you cut out the centers too!

You can either fry or bake your donuts. THATS RIGHT. You don't have to fry them for them to be delicious!!!! If you choose to fry them, make sure you do them low and slow. About a low to medium flame, trying to get the frying temperature at 300 degrees F. If you are baking, grease your pan and crank up your oven to 375 F for about 15 minutes, but keep an eye on them because you don't want them to brown and burn.


I did two different glazes, one was a plain old sugar glaze, and the other was a vanilla saffron glaze. A glaze is super simple to make, take about a cup of confectioner sugar and then 3 tablespoons milk and mix it together. Throw in about half a tablespoon to a tablespoon vanilla extract and that is your basic sugar glaze! I topped mine off with some sprinkles (celebrating the birthday week!!!!), and the other donuts are the same simple glaze with saffron mixed in with about a drop of yellow food coloring.