Sunday, April 22, 2012

My Fake Cookie Cake

Friday of Blue and White weekend gave State College some of the most beautiful weather of spring semester. It was the start of the weather gods giving us many gifts this past weekend...blue and white weekend with bare minimum rain just seemed unheard of until this weekend! In excitement of this beautiful weather, my friend and I hosted a family dinner for some of our friends. Along with a the generic fettuccine alfredo and chopped Greek salad, we got creative with our dessert.
Being on a college budget as well as only having rare groceries available to us - we decided to make something fancy but let no one realize how cheap it was!
Our ingredients list was very simple:
2 containers of Cool Whip
(unsweetened) Cocoa Powder <-- eyeball this based off of  your chocolate preferences
1 package of chocolate chip cookies
1 bowl of milk 

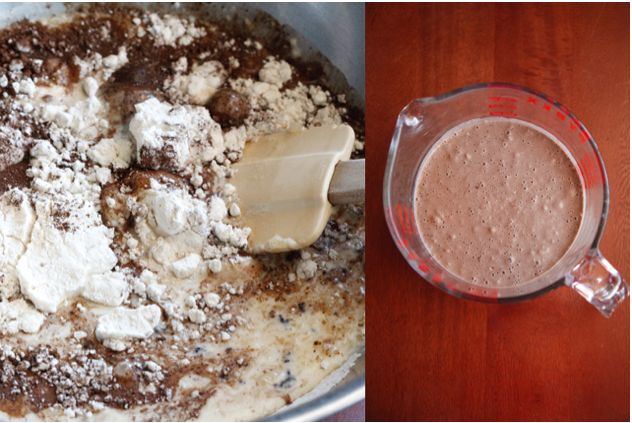
In order to make this delicious dessert in a bowl start to mix the cool whip and cocoa powder, don't overwhip it because your cool whip will begin to melt. In a cake pan or pie tin, paint a layer of the cool whip. You can add just as much cocoa powder as you'd like, we liked it chocolatey so we added a little more than what I have listed. After this you want to dip the chocolate cookies in the milk so they are submerged for about 2 seconds at max. You don't want them to be soggy because they're going to break before you set them into the cool whip. Make a layer of the cookies and MAKE SURE to put the cool whip into the freezer while you layer your cookies - the cooler the better! Keep adding layers until you run out of cool whip or even the cookies! Its best to let the cake sit in the fridge for at least two hours before you want to cut into it, it'll be firm in terms of setting but the cookies will be nice and soft from the milk and the layers of cool whip around it!
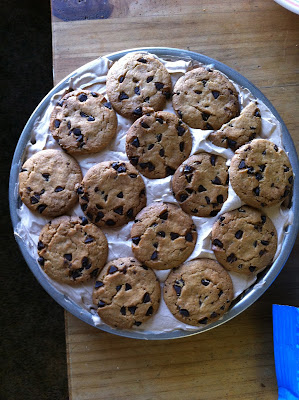
This is a cool treat that does not take very much time to make, let me know if you do anything different! You could even leave the cool whip plain and soak the cookies in chocolate milk! :) Let me know what you think!

Monday, April 16, 2012

Vegetarian Tailgate

Although it is not football season just yet (I'm secretly counting down...) a tradition at my college is an annual football game where the offense and defense split into two teams. Its a very meaningful game because it symbolizes the end of the spring semester, intro into finals, bittersweet memories for the seniors as this is their last tailgate and a reminder on how much my school loves football! The Blue and White game is something that people begin to talk about as early as February! Keeping this in mind, tailgating is a huge aspect of football season and my school holds nothing short of this. This weekend there will only be a few things you'll be smelling - the burning of charcoal as people start up their BBQ, the tartness of vinegar from some coleslaw for those bbq's, and a variety of beer... no tailgate is complete without beer!
In order to fulfill my desires of being fed a tailgate (it is unfortunately rare), I found a great recipe for a hearty vegetarian burger that no one would really think is that vegetarian. The classic beef patty can now be substituted for something a little healthier and a little less time consuming; this black bean burger is hearty, delicious and a great substitute for a regular burger patty!
The ingredients for the burger are as follows:


1 small onion, chopped
1/2 red pepper, chopped
1 Tablespoon olive oil
2 cloves garlic
1/4 cup fresh cilantro leaves
(2 jalapenos, optional, seeded)
1/2 teaspoon ground cumin
One can black beans, drained and rinsed
1 1/2 c. cooked green lentils (I used canned)
1 1/2 tsp. salt
1/2 tsp. pepper
2 eggs
1 c. bread crumbs
 Rinse the beans and the lentils with COLD water and make sure to drain completely. In a small pan heat up some olive oil and throw in the chopped onion and red peppers; add the garlic once the onion has started to lose a little bit of color. Once these 3 have cooked, turn off the heat and allow them to cool.In a food processor, pulse the onion pepper and garlic along with some cilantro and some jalapeno’s if you want that kick. Slowly add the beans the lentils and keep pulsing until you see a sort of pasty consistency. 

Once you’ve reached your ideal consistency, add some salt and pepper and the eggs (or more oil) as your binding agent. Afterwards, add some bread crumbs in the same process and keep combining. Make sure you’re stirring otherwise the food could be getting stuck in between the blades of the food processor. Keep adding bread crumbs until the mixture starts to stick together.
In a bowl, add some flour and make sure to have flour on your hands before you start to create the patties. You’d want to form about 1/2-3/4 inch thick patties.
 

In a well-greased skillet with about medium to medium-high heat, you want to gril for about 5-8 minutes on both sides. You want to add some oil in between sides just ot make sure you’re getting a great char on both sides. You want the interior to be soft with the outside being crunchy, it’ll be great on a toasted bun!
As for condiments, you can add whatever you want… avocado or salsa, peppers or continuing with the kick of jalapeno would be great too! Enjoy! 


Sunday, March 25, 2012

Vanilla Chai Clouds

After spending a week at home, which was well deserved after such hectic exam schedules and THON exhaustion - I finally got some time to myself. This obviously meant cooking and baking periodically even though I've been on this new health kick (ha). I found this recipe in a magazine sitting in my kitchen and thought it was such a classic idea to combine such warm and earthy flavors into a light airy cupcake.
I knew these cupcakes would be a success in my household considering how much chai (tea) my parents actually drink on the daily.
There are 2 separate bowls you'd have to make for this cake - the chai mix and the batter. The mix is what goes into the batter as well as into the icing, if you're making a vanilla icing (I chose not too just because I know my family isn't the biggest fan)
The actual chai mix is as follows:
1 1/2 teaspoon ground cardamom
1 1/2 teaspoons ground cinnamon
1/2 teaspoon ground ginger
1/4 teaspoon cloves
1/4 teaspoon ground nutmeg

The cake mix is as follows:
For the cake:
1 stick (1/2 cup) butter
1 cup sugar
2 teaspoons vanilla extract
2 eggs (not required)
1/2 quantity chai spice mix (recipe above)
 1 1/4 cups plain flour, sifted
1/2 cup buttermilk (or regular milk at ROOM TEMP)
1/2 teaspoon baking soda
1/2 teaspoon apple cider vinegar

For the Vanilla Chai Buttercream:
2 stick (1 cup) butter
1 teaspoon vanilla extract
2 cups powdered sugar, sifted
1/2 quantity chai spice mix
1-2 tablespoons cold milk, if needed

Preheat your oven to approximately 325 degrees F. In a small bowl, combine all of the chai ingredients, mix it up with a spoon so its well formed.  In a fairly larger bowl, cream together the butter and sugar for a few minutes, add the vanilla and your kitchen is going to start smelling so sweet, you're going to want to eat the air. Add half the quantity of your spice mix (this will be about 2 teaspoons) and stir until well combined. Add in the flour and buttermilk (or regular milk) alternately (starting and ending with flour). In a small bowl, mix together the baking soda and vinegar. It will bubble up and form a paste, then add it to the batter. Stir until just combined, then spoon into prepared cupcake pan until 3/4 full. Bake for 15-20 minutes.
In the bowl of a stand mixer, beat the butter until it is creamy. This will take a few minutes! While the mixer is on low, add the vanilla and remaining spice mix (about 2 teaspoons). Carefully add in the powdered sugar, about 1/2 cup at a time, until you reach the desired sweetness and texture. If you think that the icing is too thick to be a proper icing, add some COLD milk and slowly mix together again to get rid of any air. 
Since I did not make icing, I added a regular store bought vanilla icing to the tops of my cupcakes just for a little more sweetness! hope you like them!
 

Wednesday, March 14, 2012

Sunny Swigs

Recently spring has made a daunting appearance, very much appreciated by the people on campus. So many smiling faces, so many cute spring outfits and hipster stylin' sunglasses! This beautiful weather makes me want to make fruity, tropical drinks and just sit outside with a book (unfortunately, it would be a textbook). I was reading an article about how studies have shown how important antioxidants are, and how a lot of people are underrating their goodness. This fresh, light and tangy drink will definitely put more of a smile on your face than the weather already has! Feel free to keep it virgin or add a twist to it! You could add rum or even vodka to add your twist!

6 to 8 lemons (2 cups of lemon juice), plus lemon slices
2 cups water
1 to 2 cups ice
1 cup simple syrup
1 pint of blackberries (replace with any fresh berry, raspberry or blueberry)

Prepare the simple syrup by bringing one cup of sugar and water to boil, stirring until dissolved. Let cool.

In a large pitcher, muddle the blackberries, make sure to smash them completely or it will be hard to sip the fruit through a straw. Stir in the 2 cup of lemon juice, and 2 cups water. Add the ice and lemon slices. Serve in a glass with extra lemon slices if desired.
This should make about 6 cups of lemonade! Hope you like it! :) Let me know if you use any other berries and of your successes!
 

Thursday, March 8, 2012

Springing into Spring

Its sunny and warm - no need for UGG's, gloves or jackets or even looking like an Eskimo anymore! Its finally spring time! So with this well awaited weather, this recipe will make you smile with its simplicity yet cool and refreshing tastes! A simple combination of some noodles, and vegetables along with some Vietnamese flavors will remind you of how light a salad can and should be.

To start off you want to make the 'dressing' to this salad - in case you didnt know, I'm a vegetarian so this dressing can be made with fish oil instead of soy sauce but this is how I would make it:
Dressing:
3 table spoons lemon juice
3 table spoons soy sauce
3 table spoons chilli sauce
3 table spoons vegetable oil
2 cloves garlic, finely chopped
1 table spoon sugar
-Whisk everything into a small bowl and make sure its a good enough consistency in order to become a dressing!

For the salad:
8 ounces (1 box) rice noodles
2 large carrots, grated
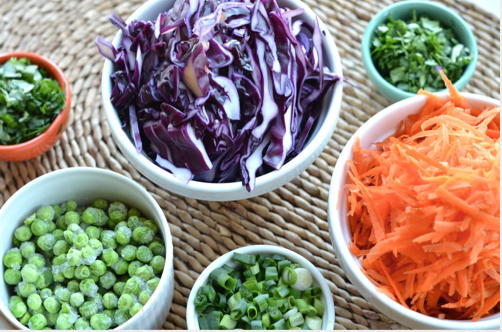
1/4 medium cabbage,(purple or green) shredded
1 cup frozen green peas
1/2 cup thin-sliced scallions
**OPTIONAL: 1 tablespoon toasted sesame seeds**


Cook the noodles following the directions on the back of the box. It should be fairly simple, bringing some water to boil and adding the noodles...make sure to keep checking on them so they aren't overcooked! Rice noodles are more gentle than regular pasta so please keep stirring the pot so they don't stick to each other! Add all of the chopped vegetables to the pot about 2 or 3 minutes before the noodles are ready. Drain all the water and add the sauce in portions.. continue to toss around all the vegetables and the noodles while you add all the sauce!
Enjoy and Happy Spring!

Wednesday, March 7, 2012

A Little Green

My apologies about the lack of blogging! It has been a hectic February with everything I had going on in my schedule! My school proudly raised over $10.6 million dollars for children fighting pediatric cancer and that is basically where my entire month of February went. Considering how soon St. Patricks Day is, I found a spiked recipe that I think fits the day pretty well!
These delicious cookies are just a great way to continue the festivities on that very green Saturday! I hope you guys like them!
PS. You don't have to wait until St. Patricks day to make them! ;)
2 sticks unsalted butter, room temp
1&1/2 cups sugar
1 egg**
1 egg yolk**
1teaspoons vanilla extract
4 cups AP flour
1 tablespoon baking powder
1/2 teaspoon salt
1/2 cup Baileys
  1. Cream butter and sugar till light and fluffy.
  2. Add egg and egg yolk. (not necessarily if you add in some milk instead!)
  3. Mix in vanilla extract.
  4. Alternate adding in dries with Baileys till combined.
  5. Wrap cookie dough in plastic wrap and refrigerate a few hours to over night.
  6. Roll out dough & cut out cookies using a shamrock cookie cutter (festive and cute!)
  7. Chill cookies at least 30 minutes before baking to keep their shape.
  8. Bake at 350 degrees for 12-13 minutes rotating once halfway through.  Start checking them after 10 minutes.  As soon as they get a little blonde on the edges, they're done. 


If you want to make shamrock sandwiches here's a great filling:
2 sticks unsalted butter, room temp
2 & 1/2 cups powdered sugar
6 tablespoons Baileys
 2 teaspoons instant espresso powder

  1. Cream butter and sugar, adding a little sugar at a time so you don't have a sugar shower.
  2. Add extract and Baileys.
  3. Fill cooled cookies.

Tuesday, January 31, 2012

Sophisticatedly South of the Border

A friend of mine told me how much he loved Mexican food, so I promised him I'd dedicate a post to him. After a lot of looking around I finally found a recipe that to me, puts forth a lot of the classic spices that are known to Mexican cooking but with a more formal approach. Being in college I get my fair share of Chipotle and Taco Bell and the unfortunate attempt at the dinning commons presenting their students with tacos, rice and beans and what they seem to think are churros. These Chilaquiles may sound extremely labor induced but I promise you - they are not! The direct translation of this word (go me for 11 years of Spanish!) means "greens in broth"
To me they seemed like a more dressed up version of nachos, with better flavors and a more detailed approach to these flavors.
Doesn't that look like a slice of spicy heaven? 
 Here's the recipe:

20-30 chips (or depending on how many hungry mouths you're feeding and how big your chips are)
1 1/2 cup diced salsa
1 1/2 cup vegetable broth (just to make it a little more flavored)
1 cup cheddar or sharp cheddar shredded cheese
1/4-1/2 cup of beans, you can mash these up a little just so it helps with the consistency
sour cream (garnish)
cilantro (garnish)
diced onion (garnish)
Make sure to have the following spices on hand: olive oil, salt, pepper, cumin, garlic powder, and paprika.

Preheat your oven to about 350F and ontop of a baking sheet layer about 7-10 chips on whatever thickness you'd like. Make sure to drizzle some olive oil before you add any of the spices otherwise they aren't going to stick and your chips will be bland and boring :( After adding all the spices, send your chips into the oven for about 12 minutes, make sure to check them so they don't burn - you can add extra time if you think they aren't as golden as you'd like. While they are in the oven, mix your salsa with your broth to make it a bit more liquidy and better to lay on top of the chips
Once the chips are out of the oven alternate between each ingredient; starting with the salsa add some beans and then cheese, more chips beans and then cheese.
Throw these bad boys back into the oven COVERED with foil so that nothing starts spilling out - at the same temperature for about 15-17 minutes at the MAX! Again make sure to keep checking on them so that the cheese is not burnt!
Garnish your slice with some sour cream, cilantro (completely optional since I personally HATE it!) and onions.
Hope you guys enjoy it! Let me know of your thoughts and comments! :)

Thursday, January 26, 2012

The Combination

I'm a student at The Pennsylvania State University and if you live in the states, you know that the past few months haven't really been easy for us Nittany Lions; from a child abuse scandal to the firing of many important administrators (including the university president) to riots and now, the passing of our legendary football coach, Joe Paterno. Amidst all of this emotional turmoil, I've been trying to pass some time by reading up on recipes and flipping through cooking websites hoping to find a recipe worth blogging about.
This recipe puts together two very unique sweet items into one delicious combination. These Tiramisu Pancakes are simple but so warm and welcoming, whether you chose to make them for dessert or breakfast - you can add your own touches to make them appropriate for the time of day. 
The recipe is as follows: (serving about 5 people)

For the pancakes:
2 cups all-purpose flour
2 tablespoons sugar  -- you could also do 3 table spoons of dark brown sugar if you're going with the cinnamon/cardamom ingredients*
2 tablespoons cocoa powder, slightly rounded, sifted
2 teaspoons baking powder
1/2 teaspoon baking soda
a generous pinch of salt
1 1/2 cups milk
1/2 cups sour cream
3 large eggs *since I'm vegetarian, this would be excluded if I were making these pancakes, excluding them isn't a big deal but just make sure to keep an eye on the consistency of the batter and add a little more milk if you need too*
4 tablespoons butter, melted
2 teaspoons vanilla
2 tablespoons instant coffee
*if you want to make these a little morning themed, rather than coffee - add in some cinnamon and cardamom, both will be great combinations with the cocoa powder and vanilla*

For the glaze (optional):
1/4 cup maple syrup
3 tablespoons softened butter
2 tablespoons coffee liqueur
For the cream:
4 oz. mascarpone cheese
1 cup whipping cream
2 tablespoons coffee liqueur
2 tablespoons maple syrup

Instructions:
Start by preparing the cream and the glaze. For the cream, beat all ingredients together and whip until you have soft peaks. Set aside in the refrigerator. (Tip: this cream tastes amazing, and is what really makes these pancakes. If you like generous amounts of cream on your pancakes, you might want to make a double portion.) The glaze is optional, but very, very (and I mean very) good. Simply combine the ingredients well. Set aside.
In a medium bowl, combine the flour, sugar, cocoa powder, baking powder, baking soda, and salt. Make sure the cocoa powder is well sifted, so that it will dissolve evenly.
In a separate bowl, combine the milk and sour cream until smooth (it helps to slowly dilute the sour cream with the milk while whisking, which reduces the chances of clumps). Add the instant coffee powder and mix well until dissolved. Whisk in the eggs, melted butter, and vanilla. Add the wet mixture to the dry ingredients, mixing gently until you have a slightly lumpy batter but without any large clumps of flour. If batter is a little runny, add a tablespoon or two of flour. I like to transfer my batter to a measuring cup or something else with a spout, for easier cooking.
Let the batter sit while you preheat your griddle.


When griddle is hot, drop batter in portions desired (1/4 cup for regular-sized pancakes) onto the greased griddle. When bubbles come up and edges look cooked, gently flip to cook the other side. Once pancakes are cooked, transfer to a plate. Spread a small amount of the maple glaze over the top of the pancake so it soaks in while still hot. Continue with the remaining batter until done.
To serve, dollop a generous amount of the cream in between layers of pancakes. Top with more cream, and then top with shaved chocolate, or a light dusting of sifted cocoa powder.
Serve with extra cream and/or glaze on the side for dipping. A bonus: these pancakes taste amazing even when cold.


Let me know what you guys think! :) 

Monday, January 16, 2012

Hot Cocoa Cookies

After my first week back at school I realized how difficult it was going to be to continue making blog posts without a kitchen :( But no fear readers, I'm getting an apartment next year which will allow me to make my own recipes and posts - but for the next 4 months or so, we'll have to deal with me telling you about great recipes I've found.
I go to school in Pennsylvania, a VERY cold state! Its unfortunate since I hate winter and hate wearing layers but there are always some great things that are only really fit for winter - such as hot chocolate. This recipe incorporates hot chocolate into a cookie form, amazing isnt it? Mixed with some mini marshmallows, its like you're biting into a cup of hot chocolate whenever you want.
You can see the little marshmallows peaking out!
Aren't they cute? Here's the recipe! Hope you like them!

Tuesday, January 3, 2012

Eataly

During my last week of break at home, I went on a little adventure of my own. I live about 15 minutes from New York City (even that's a bit of a stretch) but I never visited the city as often as you would expect. I loved visiting it for all its beauties in the lookout of a tourist but never really took the time to get to know the true city. I spent a day in the city with some of my friends to just enjoy our time away from school and the struggles that are part of it. After a day of walking around aimlessly, my friend and I walked into a lovely little place called Eataly. Owned by the world famous chef, Mario Batali this beautiful location on 5th Ave, represents everything that is Italian cooking, delicacies and tradition. Although I was unable to eat anything due to a time constraint, the smells and smiles on people’s faces told me that this place was one in a million. 
Here are some amateur iPhone pictures to show you what the place looks like:


  There are multiple little sections dedicated to different types of foods including wine and cheese, seafood, breads, meat, pasta and desserts. There are an enormous amount of tables in each section so you can sit down or take your plate around and get a little taste of everything. I would think of it as many mini-restaurants in one giant restaurant! If you ever get a chance in NYC, make sure to check this place out!

Monday, December 26, 2011

Spice It Up!


The first thought one would have when there’s a plate of cookies in front of them is, sweet! (literally) But these cookies are a little different; spiced with some warm flavors including cinnamon and nutmeg these cookies will bring a different reaction to the dessert table on your Christmas Day dinner with the family. Although Christmas is just another day in my house (#brownfamilies), I like to pretend that the season has something in it for me too. I spent a Saturday night at home enjoying the peace and warmth of my own house while my parents visited some family friends in a town nearby. I didn’t really expect this recipe to be as generic as it was, but these tastes and smells are definitely not of your usual cookies! Here’s the recipe:
2 1/3 cups of flour
1 tsp. baking soda
2 tsp. ground cinnamon
1 tsp. ground nutmeg
¼ tsp salt
2 sticks butter (do not gasp, this is the only liquid)
2 tsp Vanilla Extract (okay I lied…)
You could also use an egg to make the dough more banded together. But being vegetarians, eggs have never even entered my household so even without the eggs…the show must go on! 

In a medium sized mixing bowl add the dry ingredients (flour, soda, cinnamon, nutmeg, salt). In a larger sized mixing bowl add the melted butter and some of the sugar, make sure to add a little at a time so it is easier to mix. You’re welcome to use a hand mixer for this part, I unfortunately hate using one just because of a previous little mishap with some splatter. After incorporating all of the sugar and the butter, add the vanilla extract in – it’ll smell like you’ve walked into a candle store. Once this is completely done, begin to add the dry ingredients INTO the wet ones. Make sure to follow that to the T, adding dry to wet is the only way to get the best consistency for any sort of batter or dough. Mix all of this together and you should start to see a dough form, it might be looser than what you’re expecting but don’t worry – I have a trick for this too! Once the dough is made, cover the bowl with a plate or some plastic wrap and let it cool down in the fridge. I’d say about 2 hours is good, but you will be making trips back and forth to the fridge once you start playing around with the dough. Don’t forget to also preheat your oven while you wait for the dough to cool. 375F is just perfect.
On a floured surface roll out the dough to a thickness you like – I used about ½ an inch (eyeball it!) and with whatever type of cookie cutter you like – start making shapes. If the dough starts to rip or gets really soft, ball it up and throw it back into the fridge to cool down for a little bit.
After all of your dough has been cut out into playful shapes, line them onto your greased cookie sheet or you can even use some wax/parchment paper on a cookie sheet. The cookies will take about 8-10 minutes to cook and the minute you pop that oven open, you’ll definitely be able to smell the cinnamon and vanilla instantly.


After the cookies have come out of the oven, I put them in the freezer for about 3 or 4 minutes, just because I know my family likes their cookies a little more on the crispy side. After they have cooled, I chose to ice them with some vanilla frosting – hoping to bring out some more of that lovely cinnamon flavor.

Yeah yeah I know rainbow sprinkles aren’t really Christmas-y but its someone’s birthday somewhere right? Hope you like the cookie and let me know what you think! :) 

Wednesday, December 21, 2011

Pizza Take 2

Ironically, the same night that I posted the first pizza recipe - my brother, his girlfriend and I decided we were going to make our own pizzas in my brothers apartment. We took a quick trip to Whole Foods and bought all the necessary ingredients for this delicious dinner we had been anticipating since the minute we decided we were too tired to go out. In our basket we found some vegetables, mozzarella cheese, Harissa, and some classic marinara sauce. We made our own little adaptions to the sauce and the recipe is as follows:
1 cup bottle sauce
2 cloves garlic, chopped
1/2 Serrano pepper, chopped finely
2 teaspoons Harissa
1 teaspoon garam masala 
1 teaspoon chilli powder
salt and pepper to taste
In a sauce pan, add some oil, about a tablespoon or so and the garlic and let it start to brown. After the garlic browns add in the pepper and let them soak in the oil and continue to brown together. Add the sauce in but make sure to turn the heat down so it doesn’t splash onto you! Turn the heat back up and let the mixture start to boil – it might make it easier to throw on a lid so it can start to thicken as well. Once the sauce has started to come together a little more add the harissa and the garam masala and the chili powder, mix it thoroughly and make sure to taste it! Add salt, pepper or any of the spices according to your own tastes. 


For the veggies, we decided to go on a green spree; we used asparagus, broccoli and spinach. We put them in a brownie pan and drizzled some olive oil on top, added some salt and pepper just to make sure they weren’t super boring. Give them about 15 minutes in an oven at about 350 and they’ll be a little under cooked – just perfect to throw on the pizza before that goes in the oven.
We bought fresh mozzarella and cut it into slices and threw it onto the pizza before it was completely ready for the oven.


The pizza took about 20 or so minutes in the oven at about 350F, check on it every so often just to make sure you’re getting it to the crispiness that you like. Enjoy!


Monday, December 19, 2011

Brunch Drunk Love

Powdered Balls of Love! (awk...)
One of the most well known food cities in the world is San Francisco, California. I've only read about some of the amazing restaurants this city is home too; on my trip here during winter break to visit my older brother who recently moved out to the West Coast, we payed a visit to a restaurant called Brunch Drunk Love. Regardless of the fact that only one of us was hungover (no, not me after my 6 hour flight), the food was absolutely fantastic.
I decided to go sweet and order the warm spiced brioche donuts which came paired with two warm dipping sauces; a cinnamon-chocolate & a cardamom custard. Even though I am far from being a fan of cardamom, this sauce definitely won me over!