Thursday, July 24, 2014

Stay Juicin': The Review

So as promised, I wanted to provide an honest review to the juice cleanse that I posted about earlier this week. First and foremost let me say that everything I say in this post is in my personal opinion and is not for any reason to be understood otherwise.

My goal for this cleanse was not to lose weight, it was meant to push me into wanting to eat better and generally be healthier, which for some reason - I forget to do in the summer. This cleanse was pretty difficult to be honest, it was definitely more difficult than I anticipated it being. My first recommendation would be to eat a little less a few days going into the cleanse. It was unnecessarily painful to get through my working day when I had a splitting headache around 330pm because my stomach thought this cleanse was some kind of punishment. But on the other hand, I also was not allowed to have my regular cup of coffee that day so that could also be a significant reason for this headache.

Some of the juices were definitely hard to take down, since I am not the biggest fan of kale or collard greens in in the first place. I think what I enjoyed most about this cleanse was the variety of ingredients that were used; In each juice, I could taste all of the flavors that were highlighted on the bottle. It reminded me how much I love vegetables and fruits and how stupid it is that I have been lacking in my intakes this summer (odd considering I am a vegetarian). My favorite one of the entire day was Fuel, which has the carrots pineapple and orange. Second favorite was definitely Vanilla Cloud, the nutmeg and cinnamon combination was absolutely fantastic and the drink was super light especially since it was meant to be dessert. The juice that was the hardest to go down was Fiji, that lemon-ginger hits you and hits you HARD. I am not a fan of ginger so the minute that taste hit my tongue, I had had enough of the juice.

Final recommendation: Try it. Take my notes into consideration, but don't assume you are going to love it and don't assume you are going to hate it. I have learned after this juice cleanse, that juicing just isn't for me. I could definitely do it on my own, but I wouldn't want to buy these bottles and risk having to plug and chug because of one or two tastes (cough ginger cough).
 So all in all...
1) do your research: pick the juice cleanse that you think fits you best. there are hundreds on hundreds of different brands you can try, so don't feel limited to the few that you've heard a lot about from social media!
 2) check your wallet: these juice cleanses can easily be $50 a DAY. You have to really be prepared to know that these juices are your meals, and the money you spend - if you decide to skip a bottle or not complete the cleanse - you can't be upset when your money is wasted.
3) take the chance: even if you don't like some ingredients in the cleanse, look at the broader picture. what is your goal? whats the point of not eating for an day and just consuming these liquids for you? Have a goal in mind. Set targets. Achieve them.

Happy Thursday

Thursday, July 17, 2014

Stay Juicin'

One of the most recent eating trends that I have seen people blogging about has been juice cleanses. It took me a while to get an understanding of what exactly juicing was, and how it was different than previous trends of temporary weight loss / detox. To my understanding, most people don't do this to lose weight - its mostly considered to be a "feel better" kind of harmony where after a prolonged period of eating not as healthy as usual - this cleanse can kind of be your starting point to getting back into your healthy eating habits. Commonly used around the holiday time, I can see how this easily became a summer trend with hundreds of different cleanse recipes available online with multiple different styles, lengths and prices coming from different brands.

You can't judge a book by its cover so after a solid amount of research, I found a juice cleanse that I was interested in giving a try. For my first cleanse (hopefully not my last!) I am trying the Suja Original Fresh Start. It was one of the more convenient ones for me considering the price and the ability to pick it up at my local Whole Foods rather than getting it shipped to my apartment. The cost was definitely a huge factor for me as shipping was almost the same price as the juices themselves...
There are 6 juices per day that seem to be filled with different fruits, vegetables and other things such as nuts and coconut flakes. 
1-day cleanse

As nervous as I am, I am just as excited to give this cleanse a shot. I hope that cleansing lives up to all that I have heard from it, and I hope that I made the right decision with the brand that I went with. If all goes well, I hope to juice once a month just to remind my body that these things are the essentials.  After I complete the juice, I'll let you guys know how it went!


Friday, June 27, 2014

Are you hungry yet?


Well, this is awkward. Two months have gone by and I swear I have not forgotten about one of my favorite things in the entire world (blogging obviously) - I have just been caught up figuring out some of the other equally important things in my life. After finishing off junior year of  college, setting journey abroad for a 3 week getaway to India and then temporarily moving to Philadelphia for my internship - here we are. It gives me an excessive amount of uneasiness to think back how quickly the last two months have gone by... from being bitter about missing my cousins wedding due to final exams (still bitter btw), flying internationally alone for the first time (shout-out to the international drinking age), and moving into a brand new city for an internship I never thought I had (HR ladies and gentlemen) - I think these last few months have been the prime example of that thing that everyone talks about, growing up I believe they call it and how it affects everyone whether they like it or not.

Through this post, I want to walk you through the last few months of eating I have had. The memories that I have attached to all this food, and the endless amount of people I owe to being able to eat all this food.

 I now promise that the time I spend in Philadelphia, I will make sure to document everything (because as if I don't do that already) and make sure I post dishes that I eat that, and get your creative juices flowing as to how you can replicate that dish in your kitchen - anytime, anywhere.

Lotus Hut Cold Coffee (Indore)

Cream Stone Concepts (Hyderabad)
FYI Maggi: 23 types of Maggi (Indore)

Jalebi (Sarafa Bazaar - Indore)

Ghatiyaa Chaat (Sarafa Bazaar - Indore)
Mad Over Donuts (Bombay)


Paneer Tikka Pizza/Veggie Lovers Pizza (Dominos- Indore)

masala pav (Bombay)

Lemon Marscapone French Toast with Fresh berries

Vegetable Dumplings


Sunday, March 30, 2014

Naan Pizza

I mean if you couldn't tell already from the title of this post, I recently made naan pizza and not gonna lie it was one of the most delicious dinners I have ever cooked myself! It was definitely one of the most simple recipes I have ever created and I definitely think its possible to recreate in any college kitchen! Its filling, a great way to clean your vegetable drawer and absolutely deeeeelicious!

Ingredients
Naan (or flatbread)
pasta sauce (any kind just not alfredo)
cheese
any veggies you like on pizza


So make sure you cut up all your vegetables and have them ready to go. Grease your baking sheet and place your naan on it and have them in the oven for 2 minutes on 350 degrees. Just to defrost it and to get it crispy before everything goes on. Then just make it like any other pizza... add the sauce, put your veggies and then add your cheese! I love biting into pizza and having vegetables come with the cheese and not all of the entire top coming off. Pop it back in the oven for about 6 minutes on 350 degrees and then make sure to check on it. If you like your cheese a little crispy then put your oven on broil for two minutes and then make sure to keep an eye on it! I love putting hot sauce on my pizza so definitely keep that on side ready to go for you once you put your pizza on the plate! Let me know how you make yours! The pictures I have are my pizza and my roommates pizza!

Saturday, March 29, 2014

Chobani Pancakes

I guess it's safe to say that some things are worth waiting for. After a difficult spring semester of a lot of personal, social, and educational developments - we are back in business. A hungover Saturday morning, a necessity for breakfast and some random cravings brought this delicious recipe together. Its a very classic breakfast necessity but with a sophisticated twist. I guess you could consider my roommates and I some broke college students without the bare necessities in our fridge - milk, and eggs. Chobani pancakes are a great way to kick start your morning, not only can you make delicious fluffy pancakes but you can also add some protein to your breakfast where you might not have thought of it before.

Follow through with any other box mix but don't add the milk or the eggs - add water and a carton of whichever Chobani yogurt you think would be the most delicious. For my roommates,  I used blueberry and strawberry Chobani (in separate batches) and it worked out super well! They are a little less sweet so you might need to add on some syrup on top.

Ingredients
Pancake mix
any flavor of Chobani yogurt
water


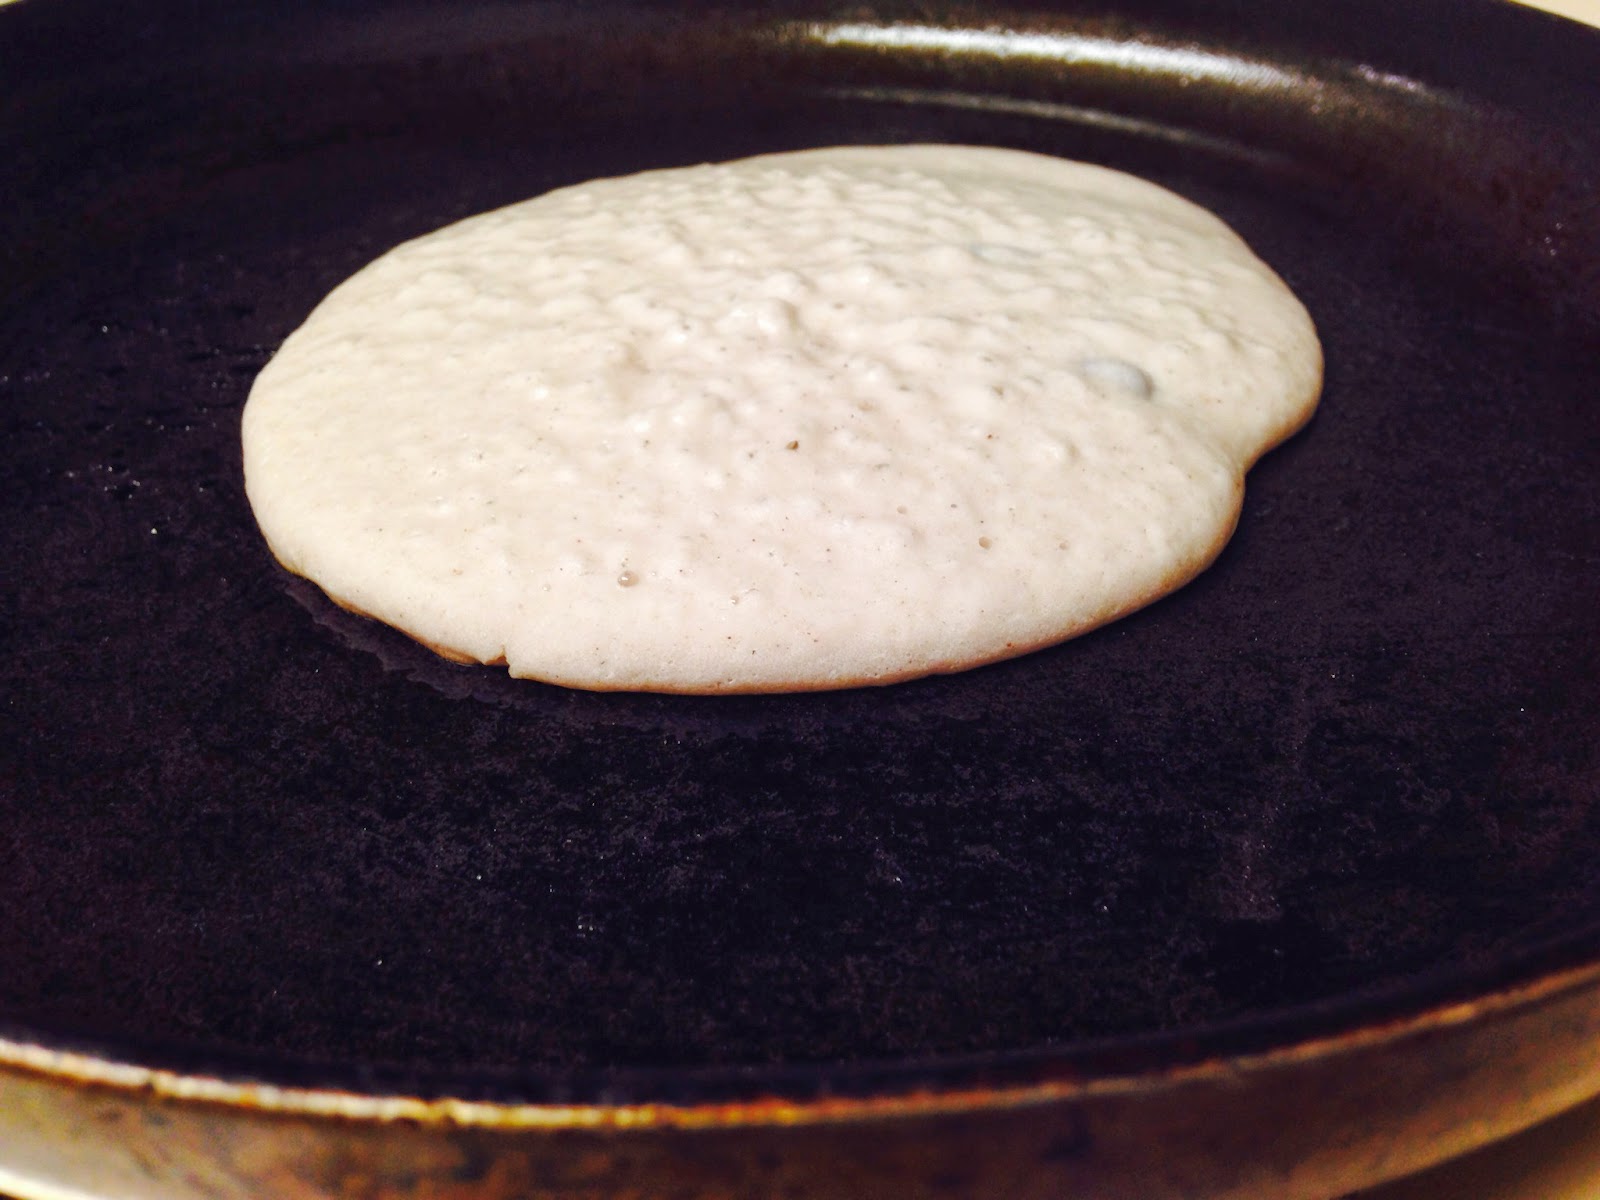
In a bowl mix together the pancake mix, your flavor of chobani and water. Make sure the batter is a liquid consistency where you can still be able to pour it onto a hot pan but not liquid where its like running water. Make sure your pan is on medium heat, where you hear a sizzle when the batter hits the pan. Make sure you keep an eye on the pan so it doesn't burn the pancakes! When you start to see air bubbles form on the top of the pancakes, its time to flip! Make sure you are using a greased spatula so you can flip the pancakes properly without ripping them or breaking them in the middle. Enjoy your breakfast and I hope it was delicious as mine!


Wednesday, December 25, 2013

Sweet and Spicy

One of the my most favorite things to eat, ever is dumplings. And I have always wanted to make them, just never had the time or understanding of how to do that. So yesterday, doing one of my most favorite things in the world (grocery shopping), I found won-ton wrappers and decided to just go with it. Whats the worst that happens? They taste terrible and I pretend like this whole little shenanigan never happened... BUT! These happened to be a HUGE success. Like I was beyond belief proud of myself (and so was my family) So here I am, sharing my very own Christmas miracle of sucessful dumplings

Ingredients
1 lb firm tofu
2 large carrots (to be diced/shredded)
2 green peppers (whatever colors you pefer)
1 package of wonton wrappers
1 bowl of water
a vegetable steamer/some sort of steamer
a teaspoon grated ginger
soy sauce
mandarin sauce
siracha sauce
brown sugar

Start off by cutting down your vegetables and tofu, you want to get them pretty small in diced form or pull out your food processor and pulse about 2 times to get a great consistency. Mix together all your vegetables, the soy sauce, siracha sauce, and grated ginger and make sure everything is properly mixed. Make sure to give it a taste, see i
f you want to add any more sauces or more vegetables.  On a flat surface that is absolutely clean, lay out a won ton wrapper and spoon about a teaspoon of the filling. Dipping your finger in some water, spread the water along the edges and then close it into a triangle, then wrap the edges together as if take the edges of the triangle and folding them inwards to so they are hidden when looking at the dumpling. In your steamer, place your dumplings separately so they don't stick together from all the moisture. 


For your dipping sauce, take about 2 table spoons of brown sugar and the same amount of soy sauce. Add about the same amount of water to dilute the mixture a little bit, and then add a little bit of siracha. The dumplings should be a little spicy, and the sauce should be a little sweet - they will compliment each other very well :) 

Friday, November 15, 2013

Thanks for Apples

I guess it's safe to say I am one of the worst bloggers that bloggers have ever seen. I'm sure I could easily line up my list of excuses ranging from being a junior in college, to having a life, to just being plain old forgetful but that doesn't change the fact that I'm still here, I still love to cook, and I will still be sharing my love with everyone who is willing to read this.
I go to one of the greatest universities in the country, where we are profoundly known for several different things - one of them, I am most proud of. I go to a school where we spend half our academic year, working to help find a cure for pediatric cancer. Penn State THON one of the first reasons why I love my school as much as I do. There is nothing bigger in my life than philanthropy, and as I sit here trying to describe to you THON - I already have tears in my eyes (#sappy). I was honorably selected this year to be a member of a Finance Committee (shout to my FINEants) and for my very first not-Indian thanksgiivng, we had a potluck.
What could be more thanksgiving than apple pie? But really, what is more thanksgiving? So I looked up some simple recipes, and kind of eye balled my own measurements and threw this bad boy together... and it turned out pretty well for my first apple pie!

Ingredients
4 medium sized Granny Smith apples
3 tablespoons cinnamon
1 tablespoon nutmeg
9 tablespoons sugar
1 stick butter (total)
1 cup all-purpose flour

Preheat your oven to 350 degrees, please. Then dice up your apples, however you want them to be. I chose to do small dices, you could do slices, medium dices - anything you want. Just remember, the bigger the pieces the longer it is going to take to soften up in the oven. Melt about 3 table spoons of butter and in a bowl throw together the cinnamon nutmeg and sugar and add in the butter. Pour this mixture over the apples and mix it around. Enjoy that smell, just embrace it, because it is glorious. In your pre-bought pie crust, neatly place the apples. Try to keep it even as it will help in the timeliness of the cooking process.
Pop it in the oven preferably on the lower shelf, set your timer for about 12-13 minutes and check the apples for softness. You want them to still have a little crunch because you will still have your buttery topping to place on top which will allow the apples to keep cooking. While your pie is in the oven, start up on your buttery topping.
In a bowl, add in the flour and make sure you are keeping watch. You may have to lessen it a little bit if you don't want a lot on there. Melt your butter and using your hands, mash the flour and the butter together. Again, you may need to keep an eye how much more or less butter you need. Mix it around and add in your sugar; the whole mixture should be fairly crumbly but able to hold shape if you were to just grab a handful and ball it up.
Check your pie! Don't let that crust get too brown, and take the pie out and sprinkle your topping on top. Let it be as even, or uneven as you want - whatever works for you. Pop the pie back in the oven, this time TOP SHELF! Get some browning action going on, and about 8-10 minutes later - you'll be smelling the amazingness of a homemade apple pie.
Feel free to serve with vanilla ice cream, whipped cream, or even cool whip or just by itself which is also pretty damn delicious.
 

Wednesday, July 17, 2013

Quinoa goes South West

As I write this post sitting on my deck, swatting the flies and enjoying my moms ice cream cold coffee creation I can't help but think about what my summer would be like if I wasn't at home. But nevertheless, I am thankful for being able to enjoy time with my family and home friends before running back to the hustle and bustle of school. As crazy as it sounds, I have been home for 2 months already and I still have another month and a half to go before returning back to Happy Valley...and I am 100% okay with spending each and everyday in suburban town that I have grown up in. Recently, my mom and I have decided on trying new things and making my dad the guinea pig. Our most recent adventure was the inspiration for this post: southwestern quinoa. This recipe hid the secret ingredient, which I hope you were able to guess by now in a way that made my entire family emjoy taking this risk. This yummy casserole not only encompasses things that are common to southwest flavors like beans and onions, but asks you to throw in some cumin and cayenne to take it to another level. Take a chance with this safe but risky dish because I promise - you will not be disappointed.
  • 1,5 large cloves garlic, minced
  • 1/2 onion, minced
  • 1 jalapenos, seeds and ribs removed, minced
  • 1 tablespoon oil
  • 2½ cups cooked black beans, rinsed
  • 1 cup vegetable broth
  • 1 cups cooked quinoa
  • 1/4 teaspoon cayenne pepper
  • 1/2 teaspoon chili powder
  • 1/2  teaspoon cumin
  • 2 bell peppers, diced (mine were red and yellow)
  • 1/2 cup shredded Mexican cheese

Follow the procedure on the quinoa, it may seem a little confusing but just try and play along
see how fluffy they got? just like rice!
dem beanies!
Keep a little bit of water handy in case you realize you need to add - its going to take about 15-17 minutes for the quinoa to get where its supposed to be but in the mean time... cut up your peppers and onions and garlic. In a small pot throw in your garlic, and onions and get that aroma filling your kitchen. Then add in your beans and veggie broth and let them soak up and boil down until you have a very small amount of liquid left. In another DRY pan throw in your peppers - you are going to dry roast them. Just put them all in there once the pan is about medium-high heat hot and let them sit for about  3 minutes and then give them a quick toss and let them sit for another 2 minutes or so. Once the quinoa has cooked you want to do the same thing to them in a different pan - that will be a little harder and take a little longer as the quinoa was previously wet. While you do this, add in your spices - salt, cumin, chilli powder and cayenne pepper. Toast them all in and make sure everything is well mixed.

In a preheated oven at 375F, foil the dish for the first 20 minutes and then take the foil off and leave it in there 10 more minutes. Serve HOT with chips, tacos, anything you'd like! :)


Tuesday, June 18, 2013

Tie Me a Shoe? I mean...Tiramisu

My addiction to the Food Network and other culinary related programming has only grown since the school year has ended and I have been home. Not only have I realized how much I love American cooking shows, but I love Indian and Spanish (lolz 10+ years of Spanish coming in handy) programming as well. When I turn on the TV, the first few channels I visit are those that host my favorite cooking shows. Recently, I was watching Bobby Deen's show entitled Not My Mama's Meals - a spinoff of any show Paula Deen has ever hosted. (Bobby is the son of the infamous Paula) He manages to mimic his mothers recipes in a much healthier and modernized fashion. 
In this episode, Bobby took his mothers tiramisu recipes which uses more than 1 cup of sugar and multiple eggs and made it his own by lowering the amount of sugar and removing all eggs. I love this; being a vegetarian household that also does not allow eggs through the front door - its a struggle sometimes to make a dessert or any dish that requires egg substitution because the it just isn't the same.
So I used this recipe as my inspiration even though I changed some stuff around to make it work for those who would be eating it: my family!
  • 8 ounces low-fat cream cheese 
  • 4 ounces mascarpone
  • 1/3 cup sugar
  • 1/4 cup brown sugar 
  • 2 ounces semi-sweet chocolate (pref in chips or coin form)
  • 1/2 teaspoon vanilla extract
  • 2 dozen ladyfingers
  • 1/2 cup heavy cream (to make whipped cream)
  • 2 teaspoons espresso (for the whipped cream
 Make sure all of your ingredients are at room temperature (besides the heavy cream because thats just nasty). In a large bowl mix together your cream cheese, mascarpone and sugars all together. In order to melt the chocolate, you can either throw it in the microwave or create a double boiler. I made a double boiler just so that I could properly watch the chocolate melting. In order to make a double boiler have about half a cup of water in a pot and have your chocolate in a bowl on top - let it melt on its through the heat coming from the boiling of the water, keep the heat low. While that continues to happen, make sure you grease your pan or whatever dish you are choosing you use. Since you are not baking this dessert, it doesn't make a huge difference as to what pan you are using. Then you can start layering the first layer of your lady fingers, make sure it is even as this will make it easier when spreading the filling.
After incorporating the chocolate into your cheese and sugar mixture, don't forget to add the vanilla extract! Once everything is ready, start layering the filling on top of the lady fingers, then continue the second layer of lady fingers and the second layer of filling. Make it as clean or as messy as you want it to be, it will still taste delicious - I PROMISE! Keep the tiramisu in the fridge overnight or for at minimum a few hours for everything to soak in and firm up. The whipped cream is totally optional but there is a little less sugar in this dessert than normally expected of desserts so I decided to make it. Using 1/2 cup of heavy cream and a hand mixer, just whip. Whip it until you can create peaks or take a spoonful and flip it over - if it doesn't fall or slide off - you have made a great whipped cream! I added some espresso to mine to make it more coffee-like as a typical tiramisu is.
 I hope everything works out for you and whoever you feed it too loves it as much as my family did! Happy cooking! :) 

Sunday, May 12, 2013

A Bit of Everything

Adaptation is one of my fortes, but change is not. I hate change; it makes me anxious and nervous and now, I have a pit in my stomach just talking about it. But sometimes, change can be worth it. Moving out of my first apartment, saying goodbye to some of the people that have made my first two years of college as amazing as they were, and spending my first summer at home in 3 years has been the assortment of things I have been doing this week.
As cheesy as it sounds, this dish is kind of like a mix of my feelings this week... something new, something old - just a bit of everything. I think I tend to eat my feelings, not in quantities but definitely in tastes. Chinese food is my comfort food (besides Indian... #DesiPride), so the minute you hand me a bowl of noodles - I am a happy girl. Throw in some vegetables and tofu - I am a happier girl. I made this dish for my parents, and it was a hit in the house; I used spaghetti as my noodles, household vegetables, and a new twist on cooking tofu.

Ingredients
1 container of extra firm tofu
2 bell peppers (same color, different, whatever floats your boat)
1/2 onion (red or white, whatever floats your boat)
12 baby carrots
1 can of baby corn
1/2 a head of broccoli

Marinade
1/4 cup Soy Sauce
2 hefty tablespoons Siracha sauce
1 teaspoon chopped garlic
1 teaspoon of sesame oil
2 tablespoons lemon juice
3 tablespoons brown sugar

The first and the hardest part about handling tofu is making sure it is not as wet and water-filled as it is when you first take it out of the package. After removing it from the package, make sure you have drained all the water out and then you can begin to cut it into triangles/squares however you chose. Using either multiple paper towels or 1 cloth kitchen towel - lay your tofu pieces on top of this surface. Then cover it with another of the safe surface. Press down LIGHTLY! Make sure you are not squeezing your tofu, but you are just giving it a nice big hug to let out whatever water may still be in the situation. Let your tofu friends, sit and hang out (aka dry out) for a little bit while you can move onto making the marinade and cutting the vegetables.

Cut the vegetables however you want and make your marinade. Make sure you have let your tofu sit for at least 30 minutes. In an IRON skillet that is preferably FLAT (to make it easier for you), without adding any oil or butter, take your pieces of tofu about 5 to 8 at a time and place them on your skillet.
Keep the heat pretty low, and using a spatula you want to just pat down on the pieces - make sure you can here them sizzling. This is helping your tofu pan-sear in its own water; this will help make the tofu soft and chewy and absorb your marinade more. Flip and make sure to do both sides. Your aim is to get something close to a golden brown.
Once you complete pan-searing your tofu, throw them into the marinade and let them sit until the very very last second. In another pot, get your spaghetti going! Thats the easiest part of this whole process; you really can't mess up pasta...

And in one third pan... throw in some garlic and your cut onions and let them sizzle and enjoy themselves for a little bit. Throw in your peppers and carrots and baby corn and let them hang out and join the party. Then at the very last minute, add in your broccoli.
clearly I missed some veggies
Make sure you don't forget about your pasta in all this veggie madness!  Drain your pasta, and throw in into the veggie pot and mix it around lightly.

Add in your tofu, along with the marinade and let everything sit at about medium heat, letting things quickly mingle together, tossing it around and making sure the vegetable and the noodles get a bit of everything.

If it isn't spicy enough, make sure to leave some Siracha sauce at the table for anyone to add in some more spice. Enjoy :)


Tuesday, April 23, 2013

A Little Homemade

I think I have successfully been awarded the position of worst blogger ever. Who takes 3 months to write a post? Apparently its me. Well my apologies to everyone who is out there and takes the time to read my blog (thank you!) but I PROMISE, with summer rolling around and nothing else to do but eat - you will be seeing plenty more posts!
So whenever I get a little homesick, I think of something to make that I often eat at home. I am a huge fan of Lipton/Knorr Pasta packets, but I know that spending that $1-$1.29 can easily be avoided by me making a meal at home. This little dinner adventure was my little homemade take on cheddar broccoli pasta. With a little insight from my mom, I made something pretty damn close to what this packet entails.

Ingredients
1 Head of fresh brocolli
1 half pint of whipping cream
1 package of shredded cheddar cheese
a handful of penne or elbow pasta
2 tablespoons butter


In order to make this process go by a little quicker, the first thing you definitely want to do is cut your broccoli into small pieces. It doesn't really matter what size you make them, as long as you have a pot big enough to quickly steam them. Cut them up, and throw them in a pot with some hot water and put a lid on it - keep the stove on medium as all you want to really do is soften them up but not lose any of the color or lovely nutrients. Keep an eye on them, they won't need more than 5-7 minutes! Moving on, throw in your pasta as usual following the direction of the box - keep checking on it because no one likes mushy pasta. In another smaller pot or saucepan, melt down the butter a little and just make sure the pot is coated - you don't want to burn anything. Throw in some of the whipping cream and add the cheese. KEEP STIRRING! The last thing you need is your cheese to be stuck to the bottom of the pot! Keep adding the cheese until you have a good consistency, and if you think you are getting too cheesey (which I don't even think its possible)  add a quarter sized amount of the whipping cream if you really need it.
Finally, once all your components are done - make sure you have drained and let the broccoli cool for a little bit and the same thing with the pasta. You can either put it all together in the bowl you plan on serving it in, or put it all together and toss it around in the pot that you had originally made the pasta in considering size.
Let me know how it goes, what you add and what you change and how you like it! :) happy eating! 


Friday, January 11, 2013

Strawberry Lime Lovin'

Happy belated holidays to all of my readers! I just finished my first semester of sophomore year and had a great 2 week break at home. Although most people at PSU would say the break was too short, for me - it was just perfect. It was enough time to see family, friends and the people who matter as well as enough time to lounge, bum and contemplate the meaning of life. Although I did not cook too much during break and mainly tried to feast on my moms delicious home cooked meals, I did have time to make several desserts. This dessert, inspired by something I saw on Giada At Home on the Food Network (aka my second favorite show on the channel). My dad is a huge dessert person, and recently we've been trying to get him onto a more healthy lifestyle. He has always been the one to push us ahead in line for seconds for dessert because he says those are the little things in life we should enjoy.
This recipe was super simple and I thought of it on the drive home from a grocery trip with my mom; with just 1 store bought ingredient this will be something you adapt to make for any season!
 Filling portion:
1 tablespoon sugar
1 lime (for zest and for juice)
2 tablespoons water
8-10 strawberries (diced!)
1 jam packed tablespoon of orange marmalade

Topping:
1 1/2 cup oats
3 tablespoons brown sugar
1 table spoon melted butter
1 Graham cracker pie crust or these ingredients for 3 mini-pies.

In a small saucepan, add the water and sugar and bring it to a boil - you are trying to make a simple syrup to add a little sweetness to the strawberries. Once this is at a boil, add the lime juice and the strawberries which you have diced up and then add the orange marmalade. Once they begin to bubble a little bit, take a taste and see if you want more sugar or more orangeness or more strawberries or if everything tastes good. Now, at the last minute add the lime zest! You want it to be in the strawberry "compote" long enough to infuse its flavors, but short enough so that the zest is still bright green like its original color. Take a taste and make sure these flavors have had enough time to mingle with each other, and turn off the heat letting the mixture cool. Before you begin to make the topping, preheat your oven to 350 degrees! For the topping grab a food processor or if its easier, just do a rough chop of the oats and add in the brown sugar mixture and make sure they are at the same size pieces. Melt the butter as your binding agent so that the sugar melts a little and sticks to the oats because the topping will become crispy but sweet all at the same time.
Fill the pies with the strawberry "compote" and then top it off with the oats mixture and send them into the oven for about 7-9 minutes, just until the brown sugar starts to darken on the top.


Eat them hot, thats the best part! Enjoy :) and let me know what other kinds of fruits you use!

Wednesday, November 21, 2012

Mint Magic

Happy Thanksgiving! I hope you all have some great food this holiday season, because besides the sleeping and being with family - that is the best part! So I started my holiday eating festivities a little early, but I promise I didn't go too crazy! This recipe is a great theme for this wonderful holiday season, it is warm and melty at the same time. I tried to use a classic recipe and then add in my little twist... and surprisingly, it worked! A lot of holiday season cookies call for peppermint extract or some sort of weird things that you can really only use once a year at max... my twist was something you can find year round and I know my family would eat even if it wasn't the holiday season.
Ingredients:
2 2/3 cup all-purpose flour
1/2 cup white sugar
3/4 cup brown sugar
1/2 cup melted/liquidy butter
1 teaspoon baking soda
1 teaspoon baking power
2 teaspoons vanilla extract
a HUGE handful of chocolate chip (whichever kind you want, I happened to use semi-sweet)
a HUGE handful of mint M&M's
*you might need a little milk to make the dough a little firmer, but definitely eyeball how much you'll need - I used about 2 teaspoons*

Preheat your oven to 350F and while that is going, get your butter in a bowl and throw it in the microwave to melt it down a little. In a large bowl, add your two types of sugar and then slowly start to add in your butter. Add in the vanilla extract.. and first, take a second to smell the mixture because that is actually liquid gold - I wish you could just eat that smell. Then add in your baking soda, and baking powder. Mix all that together and then start adding in your flour. After adding about half of it, make a judgement call on whether or not you are going to need the milk or not. Then continue adding in the flour. Once its all added, make another judgement call whether you need milk - you do not want a runny dough - these are cookies not cupcakes. But you want a dough you can play with in your hands without it being rock hard.
Once everything is mixed in to your liking, add in the chocolate chips. Feel free to break up the m&ms whether you use a spoon to just mash them around or throw them in a food processor really quick. Throw them into the mix - before you start making your balls for your cookies make sure your cookie sheet is greased!!!! Grab a glob of dough and go to town, make them as big or as small as you want for these cookies... just make sure you have enough chocolate and mint in each one :)
Set them in your oven at 350, for about 8-10 minutes - make sure to check on them! If you want gooey cookies, pull them out at around 8-8 1/2 minutes.. for crispier ones, wait until the 9 minute mark and then leave them out on a rack to crisp up.