Shoutout to 2015: hope you all had a fantastic 2014, and an even better kickstart to this new year! Thanks for taking some time to read my blog - I really appreciate it!
Happy Holidays! One of everyones favorite things to do around the holiday time, or any time spent with family is to bake! I am obviously no exception to that, and to end my holiday break at home on a sweet note - I decided to make this delicious dessert. In all honesty, it was because of my mom pestering me to finish the groceries that I had bought throughout my vacation because neither my parents nor my brother eat the junk I do (#collegekidprobs). So after having done some reading online and some research about why cheesecakes were almost always made with eggs and therefore, never made in my house. This recipe is my best representation of how to make a cheesecake without using eggs or even milk!
In my recipe, I used strawberries because thats what fruit we had on hand and I felt that the strawberries were going to be tart enough to cut the sweetness of the condensed milk I was planning on using. If your family isn't as strawberry fanatic as mine is, feel free to use a different fruit! But definitely keep in mind the overall sweetness factor of the condensed milk in your decision making!
Ingredients
1 graham cracker crust (or 6 mini crusts)
5-7 strawberries (in fourths, making it easy to puree)
4 oz cream cheese *ROOM TEMP*
4 oz mascarpone cheese *ROOM TEMP*
1 14oz can condensed milk
1/3 cup lemon juice
2 tablespoons sugar
1 teaspoon corn starch
Cut up your strawberries and have them pretty small, it'll be easier to puree. Once you have pureed them, put them in a saucepan on low/medium heat. Add in your sugar (if you think you need it!!! don't feel compelled!) and your corn starch - bring your mixture to boil. It will take about 5-7 minutes for the components to come together and boil, continue stirring throughout this time so the corn starch dissolves within the puree and doesn't get clumpy and lumpy. Once this is done, set it aside to cool - you won't need it for a little while!
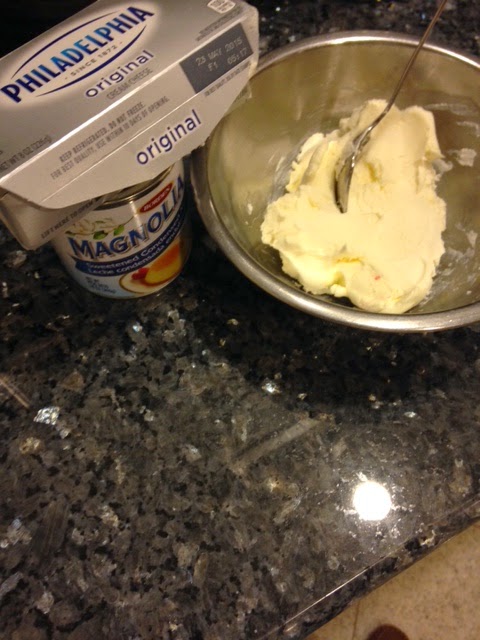
In a bowl, whisk together your cream cheese and mascarpone. If you can't find mascarpone cheese don't worry about it - use a full 8 oz container of cream cheese and it'll work just as fine. Whip it up, beat it down, and add in your can of condensed milk. Its best to do this slowly just so half the mix doesn't end up on you or your workstation. Add in your lemon juice and mix it all up. This mixture will be a similar consistency as a cake batter but a little thicker because of the condensed milk. Set aside to rest for about 5 minutes while you prep your crust.
I used mini crusts just because I know my family likes individual servings better but feel free to use one giant crust as well, whatever you prefer or have on hand! You should be able to pour in your cream cheese mixture rather than having to spoon it because that will unfortunately take quite some time. Once you've filled you crust to about inch or so from where the crust starts - you are good to go. Grab that fruit sauce you made earlier, and dollop on some of it throughout the cream cheese mixture. Using a knife or a fork, start painting. Honestly, the only thing to NOT do here is dig your knife or fork into the bottom of your crust - DO NOT DO THAT. That is not good! It'll ruin your base and might even have your liquid start leaking around.
Put this badboy(s) into your fridge and let it sit for at least two to three hours. The longer it sits, the better it will be! Hope you enjoy!


Happy Holidays! One of everyones favorite things to do around the holiday time, or any time spent with family is to bake! I am obviously no exception to that, and to end my holiday break at home on a sweet note - I decided to make this delicious dessert. In all honesty, it was because of my mom pestering me to finish the groceries that I had bought throughout my vacation because neither my parents nor my brother eat the junk I do (#collegekidprobs). So after having done some reading online and some research about why cheesecakes were almost always made with eggs and therefore, never made in my house. This recipe is my best representation of how to make a cheesecake without using eggs or even milk!
In my recipe, I used strawberries because thats what fruit we had on hand and I felt that the strawberries were going to be tart enough to cut the sweetness of the condensed milk I was planning on using. If your family isn't as strawberry fanatic as mine is, feel free to use a different fruit! But definitely keep in mind the overall sweetness factor of the condensed milk in your decision making!
Ingredients
1 graham cracker crust (or 6 mini crusts)
5-7 strawberries (in fourths, making it easy to puree)
4 oz cream cheese *ROOM TEMP*
4 oz mascarpone cheese *ROOM TEMP*
1 14oz can condensed milk
1/3 cup lemon juice
2 tablespoons sugar
1 teaspoon corn starch
Cut up your strawberries and have them pretty small, it'll be easier to puree. Once you have pureed them, put them in a saucepan on low/medium heat. Add in your sugar (if you think you need it!!! don't feel compelled!) and your corn starch - bring your mixture to boil. It will take about 5-7 minutes for the components to come together and boil, continue stirring throughout this time so the corn starch dissolves within the puree and doesn't get clumpy and lumpy. Once this is done, set it aside to cool - you won't need it for a little while!
In a bowl, whisk together your cream cheese and mascarpone. If you can't find mascarpone cheese don't worry about it - use a full 8 oz container of cream cheese and it'll work just as fine. Whip it up, beat it down, and add in your can of condensed milk. Its best to do this slowly just so half the mix doesn't end up on you or your workstation. Add in your lemon juice and mix it all up. This mixture will be a similar consistency as a cake batter but a little thicker because of the condensed milk. Set aside to rest for about 5 minutes while you prep your crust.
I used mini crusts just because I know my family likes individual servings better but feel free to use one giant crust as well, whatever you prefer or have on hand! You should be able to pour in your cream cheese mixture rather than having to spoon it because that will unfortunately take quite some time. Once you've filled you crust to about inch or so from where the crust starts - you are good to go. Grab that fruit sauce you made earlier, and dollop on some of it throughout the cream cheese mixture. Using a knife or a fork, start painting. Honestly, the only thing to NOT do here is dig your knife or fork into the bottom of your crust - DO NOT DO THAT. That is not good! It'll ruin your base and might even have your liquid start leaking around.
Put this badboy(s) into your fridge and let it sit for at least two to three hours. The longer it sits, the better it will be! Hope you enjoy!
No comments:
Post a Comment